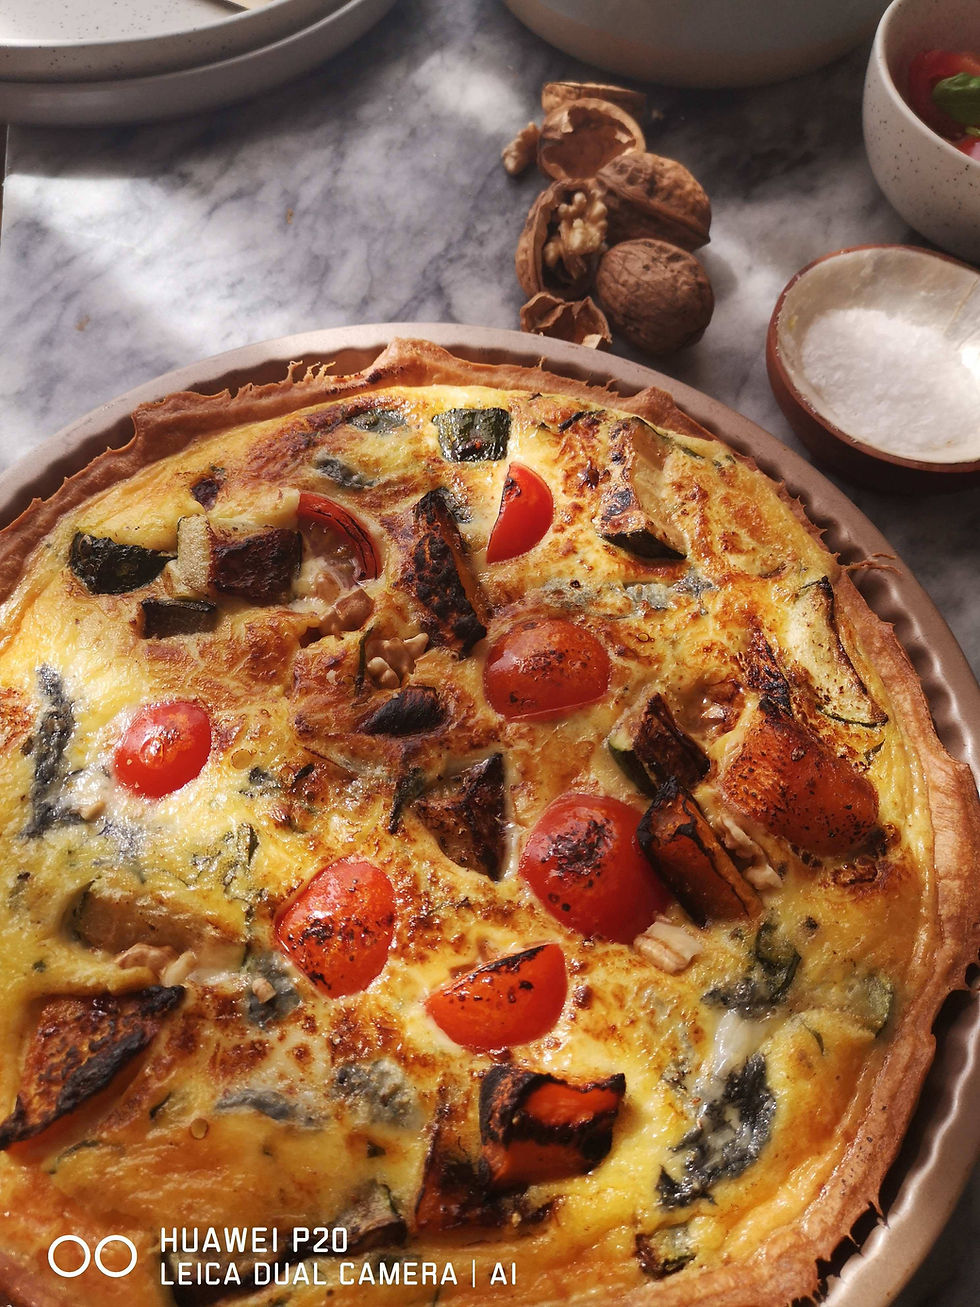
Roasted butternut squash tart with courgettes, cherry tomatoes and walnuts
I've always found that shortcrust pastry made with 50% fat (butter always btw) to flour results in a pastry that's reliable and correct enough but a bit dull, so in my early cooking days, I began to experiment with pushing the fat content as far as I felt I could get away with. That doesn't make the pastry particularly easy to work with but it's so much more pleasing as it melts on the tongue and crumbles on the plate, that I think it's worth the more precarious result. But it's up to you. You can go the safe or the risky route. If you decide for the latter, you can go as far as adding 130 grams of butter to 225 grams of flour. In either case you will need to add ice cold water, one tablespoon at a time and probably little more than two, until the pastry comes away clean from the sides of the bowl. But whereas the first is easy to roll out, the second lets you understand why pastry is often referred to simple as "paste" by some chefs. You will need to press it into the tin with your fingers, rather than roll it out. I'll say it again - it will reward you with a pastry that is buttery and flaky beyond your ken.
Whichever you go, it's essential that you chill for at least an hour, or even freeze, the prepared pastry case before baking.
Here I have enriched the pastry with grated parmesan but that's optional. Binding the pastry with beaten egg yolk instead of water leads to an even richer pastry.
For the pastry shell to stay crisp, once you add the filling, it's super important that you bake it first. This could mean blind baking it which in case you are new to baking, means that you must press a piece of baking parchment onto the pastry and cover it completely with ceramic baking beans (or even regular uncooked beans or chickpeas that you can re use). Or if your pastry has been very well chilled, frozen overnight, chilled again for several hours once in the tin and placed in the oven still very cold, it should not shrink.
Then bake on 180C for 10 - 15 minutes, till pale golden. Remove the paper, and beans, prick the pastry with a fork and cook again for 5 - 10 minutes till a deeper shade of gold. And crucially again, you must (imagine this in capital letters), let the pastry cool down completely before adding your filling and baking again. If you don't, you can be sure that the pastry will go soggy and that completely defeats the object.
Leaving a 2 cm overhang of pastry, folded in on itself, before baking is the best way I know of making sure that the pastry does what it is supposed to do, allows for the possibility of shrinkage but stays up, close to the sides. Having said that, one last bit of advice: I always leave myself a little lump of raw pastry, just in case, despite all the precautions above, the pastry does shrink a little or crack. Then you can always patch it up. The baked overhang which you'll need to trim off to neaten and prettify the edge, gives you something to nibble on while you are waiting for the tart to set!
Equipment
20 cm loose bottom tart tin
Ingredients
For the pastry
Standard Recipe
150g plain flour, sifted
75g butter, very cold, diced
50g parmesan, finely grated, optional
1- 2 tbs ice cold water Or
1 egg yolk
Pinch of salt
OR
Fancy Recipe
225g plain flour, sifted
130g butter, very cold, diced
Pinch salt
1 - 2 tbs Ice cold water
For the filling
Half a butternut squash, peeled and cut into chunks
1 large or 2 average courgettes, cut into finger thick half moons
2 - 3 whole garlic cloves, unpeeled
8 cherry tomatoes, tops left on
120g goats cheese, roughly broken
2 - 3 walnuts, broken up
5 eggs, beaten
150 ml double cream
A scrape of Nutmeg
Salt and pepper
Method 1
Pre heat oven to 180C
For the Basic Pastry
Sift the flour and salt onto a surface or into a bowl and add the diced cold butter. Rub to breadcrumb like consistency and bring together with a couple of spoonfuls of ice cold water, working very lightly.
Form into a ball and refrigerate for at least 3 - 4 hours, or overnight. Or freeze.
The next day, defrost and roll out while still very cold.
Transfer to a buttered and lightly floured tin and bake for 20 - 25 minutes till golden brown, increasing the heat after 15 minutes.
Method 2
Pre heat oven to 180C
For the Fancy Pastry
Place softened butter in a food processor.
Sift flour and salt into it and pulse to cream.
Add the ice cold water to bring it together into a thick, rich paste.
NB This will not roll out.
Flatten into a disc, wrap in cling film and freeze over night.
The next day, while still very cold, lightly roll in between the cling film. Lift, remove top layer of film and turn upside down to fit buttered and lightly floured ring or tart tin.
Press down firmly, then remove top layer of cling film.
Bake on 180C for 15 minutes.
Increase heat to 200C and bake for a further 10 minutes.
For the Filling
Method
Using a scant tablespoon of olive oil, roast half of the butternut squash, peeled and cut into chunks first.
Also the courgette, cut as above, the whole garlic cloves and roast in a preheated oven on 200 C for 25 - 30 minutes till tender and golden brown.
After 10 minutes, add the cherry tomatoes. You can leave the tops on. They just make it pretty and rustic looking. For the same reason, you can leave the skins on the garlic, knowing that people will have to remove them, or slip them off now.
Meanwhile, in a jug, mix the cream with the beaten eggs and season with the grated nutmeg and with salt and pepper.
Remove vegetables from oven and deposit over the cooled pastry case, together with the goats cheese.
Now this is what I do next:
Reduce oven temperature to 180C Open the door and pull the shelf half way out. Place the tart on top, making sure shelf is stable and carefully pour the egg mixture over, making sure it does not spill over the edge and also making sure that plenty of the vegetables show through.
Alternatively, place the pastry lined tin on an oven tray before filling it and carefully carrying it to the oven.
Delicately place the walnut pieces over the top, so they are only half submerged.
Now, very carefully slide the shelf back into the oven, close the door and bake for 25 - 30 minutes, so it quivers a little in the centre still and once out of the oven, let it sit for another 5 minutes to further set in its own heat. It’s better served warm rather than piping hot and contrary to popular folklore, the leftovers are actually good cold - though not fridge cold!